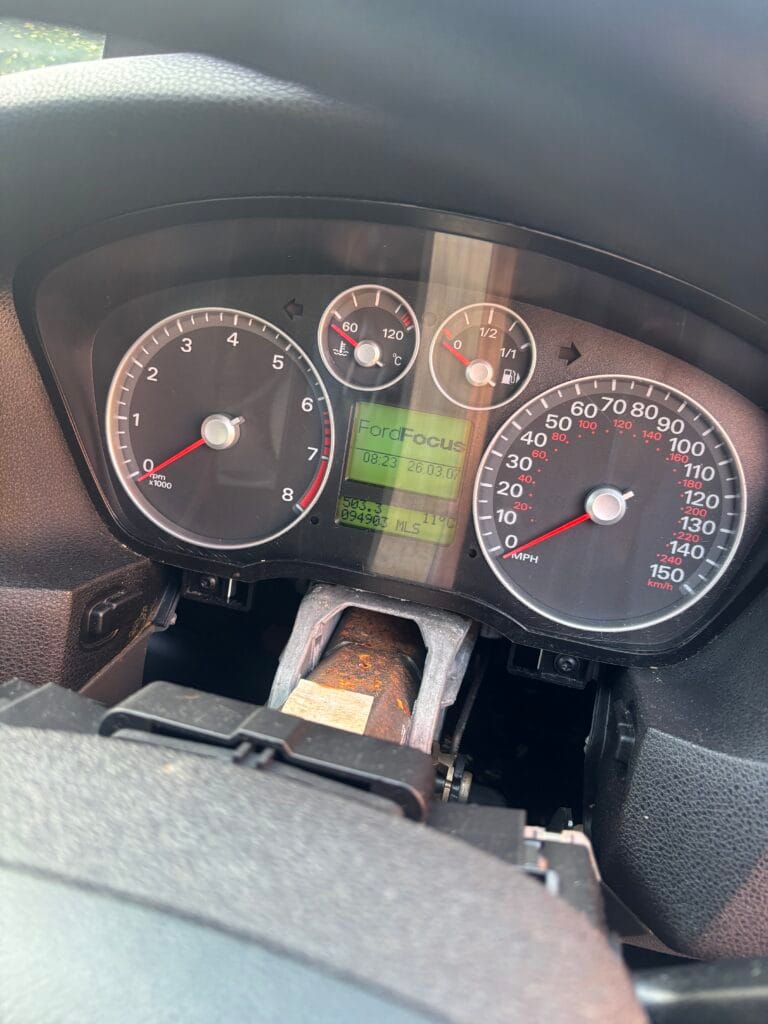
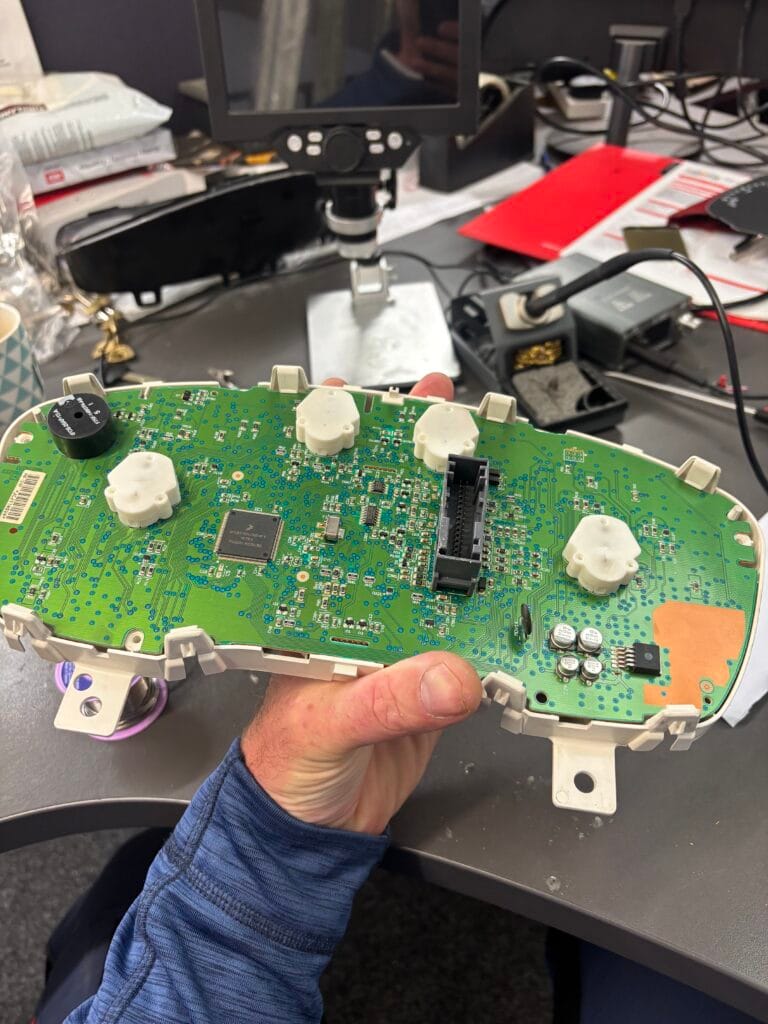
Ford will not start or is intermittent and clocks sometimes stop functioning!
Common Reasons for Ford Not Starting
To further assist, we’ve compiled a list of solutions for when your ford not starting problem arises.
When you find your Ford not starting, it can be frustrating and time-consuming to diagnose the issue. Many owners of older Ford models have encountered this problem while driving, leading to unexpected breakdowns. This guide will help you understand the potential causes and solutions to tackle a ford not starting issue effectively.
Experiencing a ford not starting can be a real hassle, but knowing the common issues can help you troubleshoot effectively.

When you experience a ford not starting, it’s often due to electrical problems that can be resolved with the right knowledge.
Understanding the electrical systems in older vehicles is crucial. The Ford clock dry solder issue can affect not only the clock but also other critical components. By identifying the symptoms early, you can prevent more significant problems down the road.
The Ford clock dry solder issue is a common electrical fault in some of the older Ford models, especially:
- Ford Focus Mk1 (1998–2004)
- Ford Fiesta Mk4/Mk5
- Ford Mondeo Mk2
- Ford Ka
These vehicles have this common problem where the connection 16 pin plug solder cracks and doesn’t have a solid connected, which can stop the clocks working and car from starting due to the circuit board being linked to the ignition system.
🔧 Common Symptoms:
- Clocks not working at all
- Clocks display flickers, dims, or cuts out
- Digits missing or corrupted
- Comes back temporarily when tapping the dashboard
Addressing a ford not starting issue early can save time and money.
When a ford not starting occurs, be sure to check the connections.
Moreover, maintaining your vehicle properly can minimize the likelihood of encountering starting issues. Regular inspections of electrical connections, battery condition, and solder joints can help avoid unpleasant surprises.
🔍Additional Troubleshooting Tips:
🔍 Root Cause:
- Dry solder joints: These are cracked or poorly connected solder points, usually where the power pins or display segments connect to the circuit board.
- Caused by:
- Age
- Vibration
- Temperature cycles
- Weak original solder from factory
Always consider the possibility of a ford not starting because of a dead battery.

A faulty starter motor can also lead to a ford not starting situation.
Noticing delayed sounds when turning the key could indicate a ford not starting issue.
Great! Here’s a Soldering 101 guide — perfect if you’re just getting started or need a refresher.
Look for dry solder joints if you encounter a ford not starting problem.
🔧Understanding Dry Solder Joints in Detail:
Dry solder joints can lead to intermittent electrical connections that affect not just the clock but potentially the entire vehicle’s electrical system. This can cause erratic behavior, especially when the vehicle is exposed to vibrations from driving.
🔧 What Is Soldering?
It’s essential to recognize that solder joints can degrade over time due to thermal cycling. Temperature fluctuations can cause expansion and contraction of the materials, leading to cracks. Regular checks and re-soldering can prevent these issues from escalating.
Soldering is the process of joining two metal parts (usually wires or components and a circuit board) using a melted metal alloy called solder.
When the solder cools, it forms a conductive and mechanical bond.
🧰 Basic Tools You’ll Need
| Tool | Purpose |
| 🔥 Soldering Iron (15–60W) | Heats the solder so it melts and flows |
| 🧪 Solder (60/40 tin/lead or lead-free) | The metal alloy that creates the bond |
| 🧹 Soldering Stand | Holds the hot iron safely |
| 🧽 Damp Sponge or Brass Tip Cleaner | Cleans the iron tip during use |
| 🌬️ Fume Extractor / Ventilation | Solder fumes can be harmful |
| 🪛 Wire Cutters / Strippers | For preparing wires |
| 🔍 Magnifying Glass or Head Loupe (optional) | Helpful for small components |
| 🧼 Flux (optional) | Helps solder flow better and clean the metal |
Experiencing a ford not starting can also be linked to temperature changes affecting solder.
🧐Importance of Proper Soldering Techniques:
Using the right technique while soldering can ensure a long-lasting, reliable connection. A good solder joint should be shiny and well-defined. Poor soldering can lead to repeated failures, resulting in ongoing issues that can be both challenging and costly to repair.
- Prep Your Iron
- Plug in and heat the soldering iron (350–400°C is typical).
- Wipe the tip on a damp sponge or brass wool to clean it.
- Tin the Tip
- Melt a bit of solder onto the iron tip.
- This helps with heat transfer and prevents oxidation.
- Insert Component
- Push the component through the hole in the PCB (printed circuit board).
- Heat the Joint
- Touch the tip of the iron to both the component lead and the metal pad on the board.
- Heat for ~1–2 seconds.
- Feed Solder
- Touch solder to the joint (not the iron tip).
- Let it flow around the pin and pad.
- Remove solder, then remove the iron.
- Check the Joint
- A good joint is shiny, conical, and covers both surfaces.
- Avoid “blobby,” cracked, or cold (dull) joints.
- Trim Leads
- Use cutters to trim off any excess wire sticking through the board.
❌ Common Mistakes to Avoid
| Mistake | Why It’s Bad |
| ❌ Cold joint (dull, lumpy) | Weak, unreliable connection |
| ❌ Too much solder | Can short nearby components |
| ❌ Heating only the solder | It won’t bond properly |
| ❌ Not cleaning the tip | Dirty tips don’t transfer heat well |
| ❌ Using too low or too high temp | Causes poor joints or damages board |
✅ Tips for Beginners
- Practice on scrap wires or old PCBs.
- Don’t rush—let the iron do the work.
- Use flux if solder doesn’t flow well.
- Always work in a ventilated area.
- Use a third-hand tool or PCB holder to steady your work.
In addition to avoiding common mistakes, it’s helpful to familiarize yourself with the soldering process through hands-on practice. This experience can significantly enhance your confidence and skills when dealing with electronic repairs, especially when your vehicle shows signs of malfunctioning due to electrical issues.
🤔What to Do When You Face Electrical Issues:
First, troubleshoot the immediate symptoms. If your Ford is not starting, examine the dashboard for any warning lights that may indicate specific problems. Documenting symptoms can assist a technician if you decide to seek professional help.
In many cases, owners find that addressing these issues early—whether it’s a faulty solder joint or a low battery—can save them from more extensive repairs. Being proactive in maintaining your Ford can ensure reliable performance and longevity.
🛠️Final Thoughts:
Resolving the ford not starting issue can seem daunting, but with proper troubleshooting, maintenance, and understanding of soldering techniques, you can navigate these electrical challenges. From recognizing the symptoms to executing effective repairs, this guide aims to empower you as a Ford owner. Always remember, a little knowledge goes a long way in maintaining your vehicle’s health.
If facing a ford not starting dilemma, check your fuses as well.
Seek professional help if you can’t resolve the ford not starting issue.
Ultimately, knowing how to troubleshoot a ford not starting problem is key.
